

Open QuickBooks in one tab and keep this page in another. Invoicing looks like a ten second job once you have done it a few times, but the first attempt often stalls on small questions. Which button starts it? Where does the customer go? Why will it not send? This guide takes the process one screen at a time, mostly using QuickBooks Online, with a short section for Desktop users near the end.
Do Three Things Before You Click Anything
An invoice pulls information from lists you have already set up, so a few minutes of preparation saves a lot of backtracking.
- Add your customer. Include a correct email address, because that is where the invoice will be sent. A missing email is the most common reason a send button refuses to cooperate.
- Set up your products or services. Give each item a clear name, a default description and a price. QuickBooks reuses these every time you invoice.
- Check your tax and company settings. Your business name, address and tax details appear on the invoice, so confirm they are right now rather than after the first one goes out.
Building the Invoice in QuickBooks Online
Here is the sequence from a blank screen to a sent invoice.
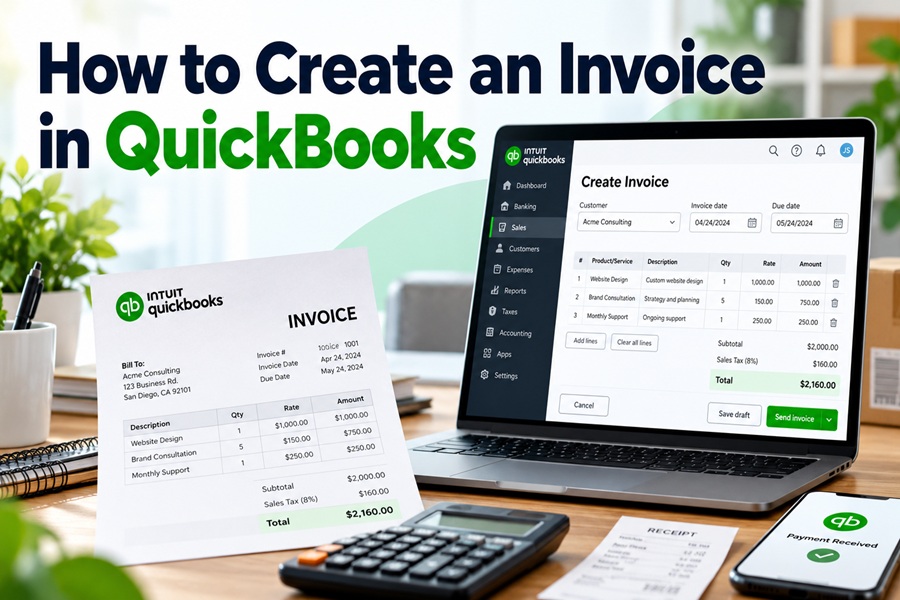
- Start a new invoice. Select the plus New or plus Create button, then choose Invoice.
- Pick the customer. Choose from the dropdown or add a new one on the spot. The email and billing address fill in automatically.
- Review the dates and terms. Check the invoice date, the due date and the payment terms. Terms such as Net 15 or Net 30 set the due date for you.
- Add line items. For each row, select a product or service from the dropdown, adjust the quantity and confirm the rate. The amount calculates itself.
- Apply tax and discounts. Tick the tax setting if it applies, and add a discount line or percentage if you are offering one.
- Write a short message. A single friendly line, such as the payment method you prefer, can speed things up. You can also add a note for the customer.
- Choose payment options. If online payments are switched on for your account, your customer will see a pay now link on the email.
- Send or save. Select Review and send to email it right away, or Save and close to keep it for later. To schedule it, use the scheduling options to set send later or print later.
Once the invoice goes out, its status shows as Sent. From there you can watch it change as the customer pays or the due date passes.
Reading the Invoice Status
You do not need to chase every invoice by hand. The status tells you where things stand.
| Status | What it means | What to do |
|---|---|---|
| Sent | The invoice has gone to the customer | Wait until the due date |
| Due | Payment is approaching or due | Optional gentle reminder |
| Overdue | The due date has passed | Send a reminder and check the terms |
| Paid | Payment has been recorded | Nothing, the record is closed |
Small Settings That Make Invoices Look Professional
Most people send their first invoice with the default look and never revisit it. A few tweaks are worth making.
Add your logo and choose a colour that matches your brand. Adjust the template so it shows the columns you actually use, and hide the ones you do not. If you invoice often for the same kind of job, set a standard message and terms so each new invoice starts nearly finished.
You can also turn on automatic reminders, which nudge customers before and after the due date. This removes the awkward follow up emails and tends to shorten the time it takes to get paid.
Three Shortcuts Worth Learning
Convert an estimate. If you sent a quote first, open it and convert it into an invoice. All the items carry over, so there is no retyping and no chance of a mismatch.
Copy a past invoice. For repeat work, duplicate an earlier invoice, change the date and amounts, and send.
Set up a recurring invoice. For retainers, subscriptions or monthly services, a recurring invoice creates and sends itself on a schedule you choose. It is a simple way to stop forgetting.
If You Use QuickBooks Desktop
The logic is the same, but the navigation is menu driven rather than sidebar driven. Open the Customers menu and choose Create Invoices. Pick the customer, select a template, enter the items and quantities, and check the totals. The invoice number is assigned automatically, though you can change it by hand. To apply a discount, you will need to create a discount item first, because Desktop treats it as a line on the invoice. When you are happy, save it, then print or email it from the same screen.
If you start from a sales order or an estimate, find it in the list, then use the create invoice option. You can invoice a whole order or select just the items that are ready.
Common Slips and How to Avoid Them
- The invoice will not send. Check the customer’s email address first. If it is blank or contains a typo, fix it in the customer profile.
- A product is missing from the dropdown. Add it to your products and services list, then return to the invoice.
- Tax looks wrong. Revisit your tax settings and confirm that the right rate is applied to the right items.
- You sent it with an error. Do not delete it. Void or adjust it, then issue a corrected one so your records stay in order.
- A payment arrived but the invoice still shows unpaid. Record the payment against the invoice, or match the bank deposit to it.
A Simple Routine to Keep
Good invoicing is mostly consistency. Create invoices on the day the work is done or the goods ship, not at the end of the month. Use clear descriptions so customers do not need to ask what they are paying for. Check the Overdue list once a week and send reminders before small delays become big ones.
Once these steps feel natural, the whole process takes about two minutes, and your books stay accurate without extra effort. That is really the point of creating invoices in QuickBooks: fewer manual tasks, faster payments and a clear picture of who owes you what.